Showing posts with label green. Show all posts

Monday, July 16, 2012

Minty Lip Balms

The lip balm factory was open again today.  This time, mostly because I had a surplus of Altoids Smalls tins (addict?) and also because I was inspired by the excess wax comb from my neighbor's bee hive.  I didn't end up using that comb because it smelled like smoke, and nobody wants a hickory-flavored kisser.  So I used regular wax...intended for such things as lip balms. 


I used this recipe again, which I love because it's simple and I had all the ingredients on hand.  Aaand, it's a pretty great lip balm.  I used a jar in the microwave this time instead of a double-boiler and it was A) much quicker, B) much less messy, and C) now I have a container to hold the leftovers until next time.

If you try this recipe in Altoid tins, be careful not to fill the tin past the hinge as your lip balm will leak out the back (which I learned the hard way). And for this reason, you might not want to keep this in your purse, in case it heats up too much (like, if you left it in a hot car or something) and leaks all over your very expensive purse.  This is best kept in a bedside table or medicine cabinet. 

But isn't it so cute?!

Sunday, July 15, 2012

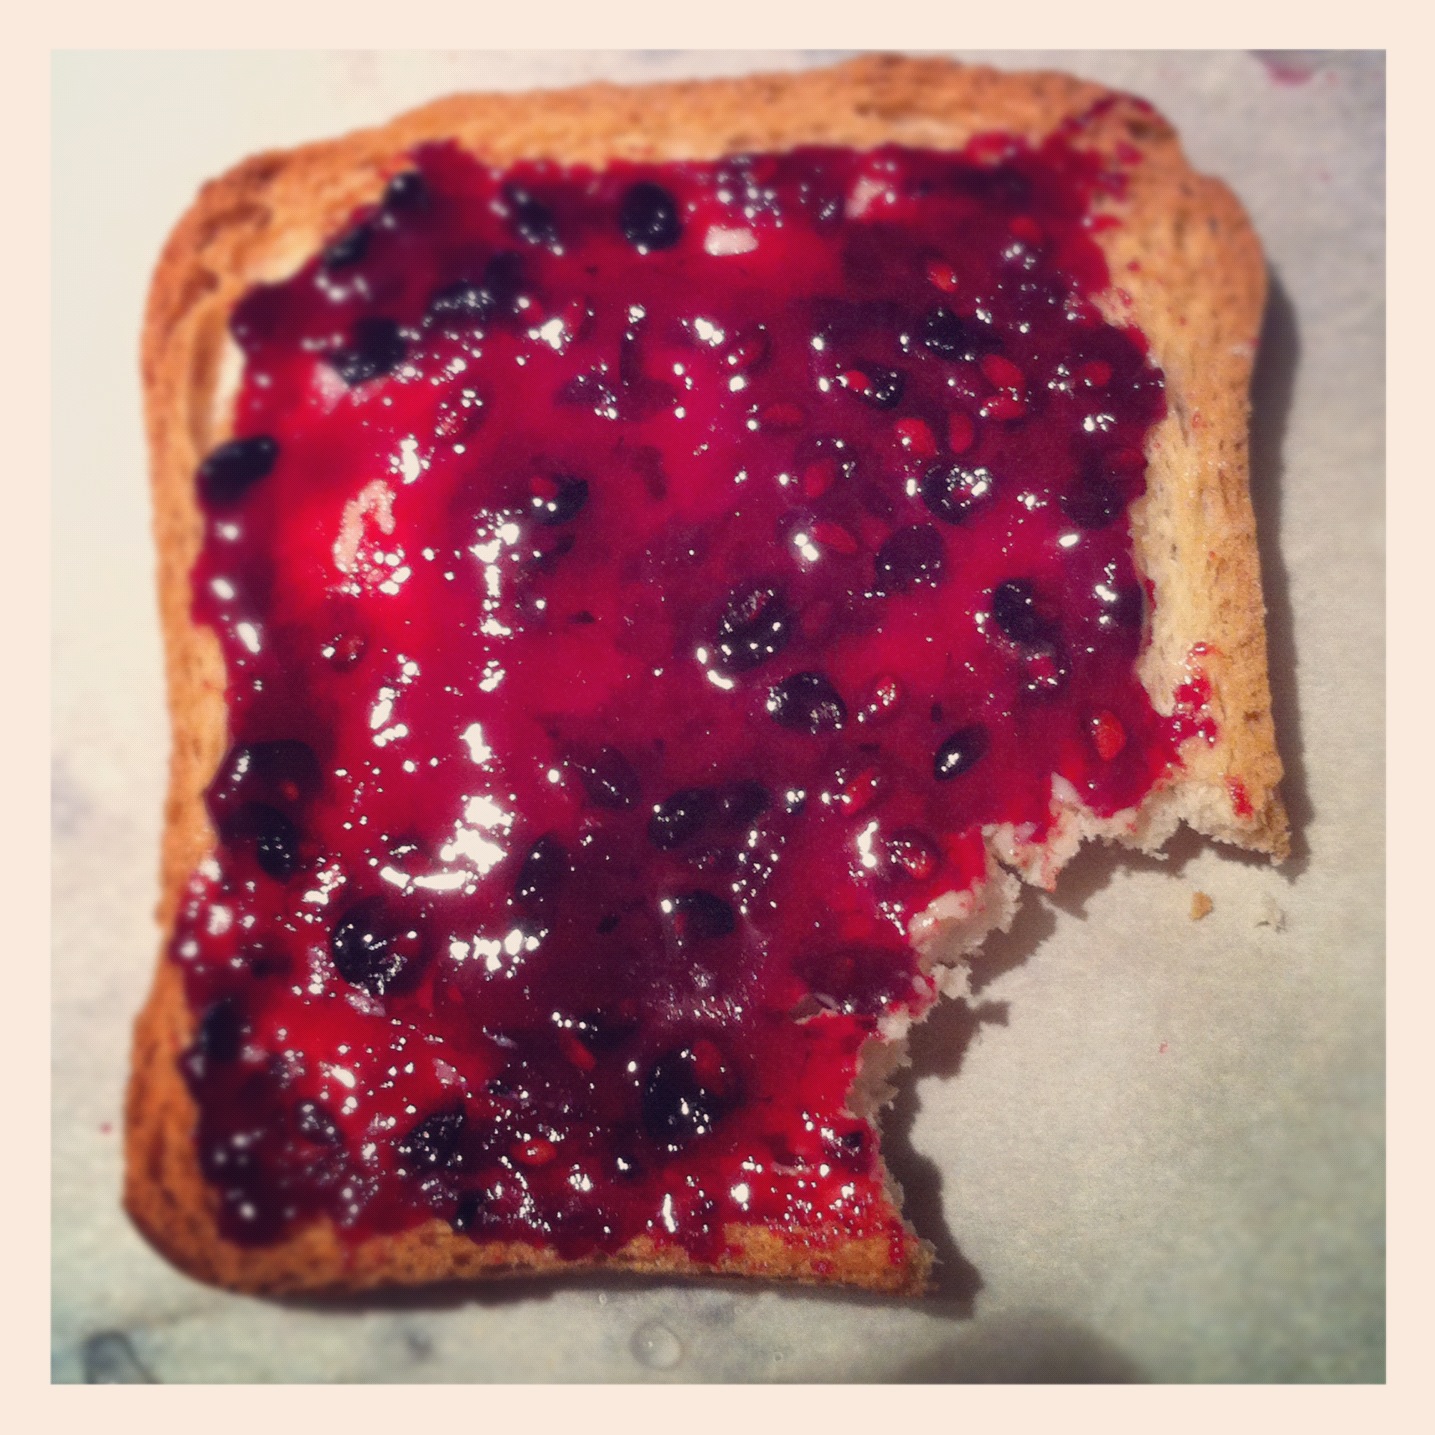
"Wild" Blackberry & Rosewater Jam


To those of you who aren't familiar with Oakland, you might be surprised to know that there are wild blackberry brambles in several parts of the city (we also have a serious deer problem, which I may or may not have told you about... more on that later).  

On one of our walks recently, D and I noticed a very prolific patch of them and made a mental note to return when they ripen. So yesterday, we marched right down there with our bucket (and ladder, maybe) and got to pickin'.  In half an hour, we picked about seven cups of beautifully wild blackberries!  (I think the movement is called "foraging," and while very trendy a term, it still sounds like "scrounging" to me...so I say "wild")

 These guys were a little fuzzier than regular blackberries, but after a good soaking, the fuzzies came right off. 


For a little added interest, I put about one teaspoon of rosewater in the jam.  You can find rosewater among the Middle Eastern or Indian products in specialty/ethnic stores.  It's not expensive, but it is potent.  A little goes a long way! D was worried that even the little tiny teaspoon I did add was too much, but it's actually just right.


Look how gorgeous and deep the color is!


And now it's officially summer, now that we've canned something.  Sidenote: This is my all-time favorite size/shape/brand of jar, in case anyone cares. Simple design (no cornucopias embossed on the other side), not too big, not too little, nice and wide, easy to pour into, easy to get jam out.


Oh, yeah. Fruits of our labor. 


Wild/Foraged/Scrounged/Organic Oakland Blackberry and Rosewater Jam


Saturday, June 16, 2012

I'm Back with Some Bread. Forgive?

Well, if I haven't completely let you down, maybe there's still an ounce of forgiveness inside of you for my lack-of-bloggingness.  It's not that I don't have things to blog about, au contraire (I studied Spanish, not French), I've just been so busy lazy about uploading photos.  Let's see if this new summer schedule will help me turn over a new leaf...again.


We'll start with something simple... a little loaf.  Now, I know you've seen my loaves before, so it's nothing new.  Still using my very favorite, easiest bread recipe with a few tweaks. This one has some rye flour (trying to clean out the cabinets) and caraway seeds (ditto), and I always add a bunch more salt.  But I swear, this method never lets me down.  Try it, you'll impress all your friends.  Or if not, impress yourself.

Thank you for your forgiveness. Everyone (my sister) was sick of looking at those lemons. Monica, you're welcome.

Tuesday, July 19, 2011

Shirt Refashioning

I wish I had taken before photos of these, but I am hasty and I get too excited.  I've discovered knit ribbing!  I'm not very good at using it yet, but I decided to sacrifice a few shirts to practice with.  Please do not scrutinize, they are very un-Virgo with lots of flaws. Whatever - I'm learning.

This used to be a turtleneck.  I liked the stripiness of it, but couldn't justify wearing it when the weather was nice (which is has NOT been in like 2 years - boo, San Francisco!).  But anyway, here's how I refashioned it:


This was a rather boring, ill-fitting shirt I got at the GAP for like $5. I had to take in the sides because it was frumpy (schlumpadinka, as we say 'round these parts), but that was a long time ago.  Anyhow, still not loving it, I added this yellow ribbing.  Mucho mejor. The yellow is a bit too lemony for my taste, but really, you can't please me - if it's not too boring it's too exciting.  Though I am pleased with this shirt now and maybe now I'll wear it to places other than the gym.


And this old thing, well, I still wear it to work even though I had to cut the sleeves off (put a hole in it trying to pull up the sleeves).  It worked as a 3/4 length sleeve shirt, but since it was pretty much garbage anyhow, I experimented with some colored cuffs.  I think I just added a couple months to the life of this shirt.  Nevermind that the cuffs are about 1/2" difference in length (awesome me!).  And yes, I wear garbage to work.


And this, folks, is what I do with a surprise day off.

Tuesday, March 29, 2011

DIY Tinted Moisturizer

I've been looking for a tinted moisturizer to bring with me to Haiti. It's going to be HOT and the sun intense, and there will be no time/need/space for makeup with the long hours I'm expecting to work (and only one carry-on bag!). More importantly, this ain't no fashion show... but, well, maybe I'm a little vain.

On the hunt for this stuff, it's hard to A) find a good color match, B) find enough SPF coverage, and C) I haven't found any under $20. I only need it for a week, and I'm trying to simplify, so I don't need any more products hanging around. So, I made due with what I had, and it actually worked out swimmingly!

Take these two products & mix them together in a little makeup pot:


And what do you get? The perfect match, perfect protection, perfect amount, use-what-you-got tinted moisturizer.


I already know I like the moisturizer and the makeup - I use them every day, so why wouldn't I like this?

It looks a little "white", but trust me, when you rub it into your face (or on your fingers or hand for testing), the color really comes through. Keep testing as you go if you decide to DIY too.

I feel a little bit fancy and a little more prepared. Wee!!

Wednesday, March 23, 2011

More Baggies

You sick of these yet? Well, I use mine every day and love them! But I promise to curb my display of them soon.


These were all made with scraps, so each bag is a little different in size. Most of them went home with my mom and sister, so I suppose I'll have to make more :)

Thursday, February 24, 2011

Stash-Busting Snack Bags


I've been home sick the past day and a half and one can only take so many 3-hour naps! I mustered some energy to go through my scraps and put together some reusable snack baggies.

While I prefer a more uniform process (hello, Virgo!), using scraps forced me to make them all different sizes. These range in size from 6.75x6.25 to 5x4.75. I have a whole stack of scraps lined up and destined to become snack baggies.

I must have gone through an orange phase, because I sure do have a lot of orange fabrics! I'll try to mix it up next go around.

p.s. Check out my friend's new blog: PeepThread ...she is so cool.

Wednesday, February 23, 2011

Tutorial: Reusable Snack Bags


You want some snack bags of your own? You can totally make them! Read all instructions before starting, and don't get too hung up on exact measurements/seam allowances. This is simple stuff - you'll do great!

Let's get started:

Start with a 6x12" rectangle of cotton fabric and a 6x12" rectangle of rip-stop nylon:


Cut a section of non-adhesive Velcro about 4 3/4" to 5" (I eyeballed this part):


Place your Velcro 1/2" from the top edge of the rip-stop nylon and center the Velcro to the middle of the fabric horizontally. Pin & sew in place around the edges of the Velcro:


Once your Velcro is sewn down, place the RIGHT SIDE of your cotton fabric to the VELCRO SIDE of your rip-stop fabric, pin, and sew only the top and bottom (short) edges using a 1/4" seam allowance:


Leaving your pieces RIGHT SIDES TOGETHER, fold the pieces in half so that the Velcro pieces stick together and you have a cotton half and a rip-stop half. Sew along the long edges leaving a 3" opening on one side (rip-stop end) so you can flip your baggie right-side out:


Turn your baggie right-side out & sew up your opening. You can clip the corners on your cotton fabric before turning for sharper corners:


Flip the rip-stop portion towards the inside of your cotton fabric. It will look like this:


Press & top-stitch your baggie. I did 2 rows of top-stitching using my Velcro as a guide.


And voila! You have made yourself a washable, reusable snack baggie!


I made 2 sizes here - the smaller one is the 6x12" instructions provided here (final: 5 1/2 x 5 1/2"). The larger is sandwich-sized using 7x14" as your starting measurements (final: 6 1/2 x 6 1/2") . I used an actual sandwich bag for the measurements:


You can hand- or machine-wash your baggies. Use them for any of your dry and non-drippy snacks. They're not water-tight, but sliced apples will be fine. These are a great stash-buster too!

Happy sewing & planet-saving!

Monday, February 21, 2011

Reusable Snack Bags

I read this [kinda life-changing] article in Sunset magazine last month. And while I perceive myself as fairly environmentally conscientious, in comparison to this family, I could only aspire to move in that direction (rather than fully adopt such a lifestyle at this time).

I mostly just wanted you to read that article and see how awesomely they live. But it really got me thinking about hyper-packaging (and packaging at all). I knew there was a justification for all my mason jar hoarding!

Anyhow, this inspiration brings us to the crafty section of this post: the revisitation of the reusable snack bag. I did end up sending them to my friend and she & her family loved them! She even ordered more and in different sizes! So exciting.

These are the ones I made for her - the request was that the fabric be not too girly, so her husband could use them too (!)... this information made. my. day. I opted for the super-awesome Echino fabrics that I bought at Purl while I was in NYC:

(hipstamatic shot = color distortion, but in a hip kind of way)

And these are the ones I made for myself. Probably also a fabric that's too expensive and fancy to get food all over, but I saw it at Birch Fabrics and had to have it. Plus, they're washable.


One is sandwich-sized (7x7) and the other is snackier-sized (6x6). I can't even wait to use them!

And if you're good, I might even post a tutorial on how to make your own! (It's rocket science, I tell ya). So get your sewing machines out!

Thursday, November 18, 2010

Advent Calendar

I am well ahead of schedule on this one! Yay! I wanted to mark our first Christmas as a married couple with something special. An advent calendar!


I was too excited that I couldn't wait until daylight to take photos... I'm love the fact that this was 100% made with pieces from my scrap bin. I really didn't have a plan in place, I just started going for it one night (bee-in-my-bonnet fashion). Luckily it all worked out.

I'm realizing that maybe advent calendars don't have a "25" - oh well, this one does!

So what goes in the tiny pockets?

Love notes?


Gift cards?


Chocolate? Yes, perfect size for chocolate...and diamond earrings...anyway! Just kidding.


I've also seen advent calendars that have a little "object" that you transfer from pocket to pocket as you count down to Christmas (like this one). Maybe I'll make a little gnome or something... but I sure do like the chocolate idea! :)

Friday, October 22, 2010

Dry Spell

I've had a bit of a dry spell. We've been traveling and not much creating has been going on around here. I did make a baby quilt for my friend's new little girl, but did I take a photo before sending it off? No. I forgot. But, I have another one very similar, so once that's complete, I'll show you that one (does that sentence have too many commas?).

Because I am so awesome, I break the dry spell with reusable snack bags (!) that I will probably not use (or reuse). Not that I'm opposed to it - these particular ones are just a bit too juvenile for me to bust out in the nursing lounge without having to defend... Anyhow, I made them with a former nursing friend in mind. She dislikes (and doesn't use) plastic snack baggies, so I'm going to send these to her for some testing out/feedback. She and her two little ones can try them out.

Enough talking, here are the bags.


Some new orange polka-dot fabric, lined with royal blue ripstop, and Velcro to close it up. It would have been awesome of me to make them sandwich-sized. Woops - next time.


I got super fancy on my first attempt with iron-on vinyl and a peek-a-boo window...


However, there was a major design flaw...


Pretzels falling out the back when shut is no bueno. I should have made the inner flap shorter than the outer, and put the Velcro on the outer flap. But I hated the black binding, it was too labor-intensive, and now I have a reason to can the design.

Friday, August 20, 2010

Buried Treasure

I'm in use-it-up mode right now, trying to simplify my life/home. I found some leftover quilt squares from this quilt hiding in one of my "crap baskets." And lookie - enough to make a little bitty baby quilt!


I pieced the batting , backed with natural/grayish linen, quilted horizontally, and bound with the fabric originally included in the quilt kit (but never used). Everything was already in my stash. Nothing was purchased. Yay!

This quilt kit was so extra awesome because there was enough leftover fabric to also make 2 of these quilts! (I gave one as a baby gift, and now he calls it his "Sara Cano blankie" - it's pretty much the kind of thing I live for).

I think this quilt kit is oficially dead. I'm OK with that. We had a good run.

So, now instead of quilt squares in a ziploc baggie hanging around the house, I have a whole quilt hanging around instead :)

Saturday, July 17, 2010

Going Places


I went on a bike ride today to one of my favorite San Francisco destinations, the Warming Hut, appropriately named. It's a cozy little coffee shop/gift shop right next to the Golden Gate Bridge. Today it was icy cold and foggy, but I found refuge (and a little inspiration) in the Warming Hut.

I bought my friend a passport cover made with a recycled map of her SF neighborhood (can't seem to find it online, nor can I find the maker). And I got inspired to make one for Darren and myself.


I used iron-on vinyl because there was no matte contact paper within walking distance...and when you have a bee in your bonnet, you just go with what you've got. It seemed to work out just fine. I used some clear (non-adhesive) vinyl for the tiny interior side pockets (to keep your passport from flying out - pun totally intended). And I sandwiched magazine response cards between the laminated maps to stabilize the whole thing and give it a center crease.

Darren got one with NYC and I made one for myself with San Luis Obispo. I have maps lying around because I like to wrap presents with them, but you could probably use any paper subject you like. Maybe I'll try fabric next!

Not sure when we'll need our passports next, but when we do, we'll look pretty rad.

Wednesday, February 03, 2010

Botched Bag Rescued

Back when the screen printing factory was open (it will reopen soon), I made all those anatomical heart tote bags. But since I'm such a novice, each one turned out a little differently. I made one of them far too light, but I didn't have the heart (pun totally intended) to toss it - and I'm too much a perfectionist to give it away.

And so ... I've embellished it a bit and turned it into something I might actually carry around (or give as a gift).


I was going to make a "pink" and a "blue" side, like a real heart, but I messed up and appliqued the pink fabric on the blue side of the heart. And so both sides just ended up with the same fabric. It's more art than anatomy anyhow.

I love it, I love it, I love it!

Saturday, January 30, 2010

Wasabi & Ginger

Remember this quilt top? Well, I actually finished it! (I know, I'm even surprised)


It's somewhere between crib and lap sized and I've backed it with a green with white polka-dotted flannel. Super yummy.


This is the first time I've used the loop-the-loop quilting pattern. I LOVE the way it looks - so crinkly and whimsical. Once I get my new quilting extension table, this will be so much easier!

The patchwork square is 100% composed of scraps that already existed in my scrap bin. It was an exercise in whimsy and spontaneity. Did I succeed? I think so. In fact, everything except the backing was already in my fabric stash. I feel good about it.

Tuesday, January 05, 2010

Microscope Tie

Dad loved the octopus tie so much, he wanted in on the action. Since he's a microbiologist, he got a microscope tie & hankies (he's a hankie man).


This is such a great way to spruce up an old tie!


My brother got a couple hankies out of the deal too. What a couple of trendy scientists, no?

Saturday, July 11, 2009

Lemonade Quilt Complete

Here is the finished product, and me gusta mucho!


I big-zig-zagged all the seams, as an experiment. And while I like the way it looks on top, it looks even way cooler on the back against the charcoal linen.


Speaking of which...I used the lightweight linen on the back as an experiment also. Peapod was closed all week, so I had no choice (well, ok) but to use what I had on hand, and the linen was the only thing I had that was wide enough and that "worked" for me and this quilt. It would have been the perfect size, except for the large rectangular chunk I cut out of it for another project. No problemo - and so the birth of this patchy little surprise on the back. In fact, it would have looked lame without it - so everything's worked out in the end.


I've busted some stash, kept myself busy, maybe made some wedding decor (who knows?), and I'm feelin' satisfied.

Now I need a real lemonade.

Sunday, July 05, 2009

My New Favorite Thing


I went to the Goodwill to drop some stuff off, you know, because we're trying to downsize? Well, I accidentally spotted (pun!) this, and couldn't leave without it! Do you just love it?!

I don't really even drink coffee, much less tote around a giant carafe of it. But say one day I do, won't I look great doing it??